With the help of Dan Berger, a veteran catamaran modifier, last summer I converted my 1979 H14 from unirig to a Turbo. Because my boat sits on the beach, Dan suggested I set up my H14 like a H16 without a rolling furler for the jib. This setup allows you to take down the jib after each sail and save a little money on the furler.
Converting your boat to a turbo is not an inexpensive conversion. You can buy a used H14 turbo (if you can find one) for less than the price total shown on the parts list below. To save money, I bought used parts from Dan, eBay and Craig’s list and got the remaining new parts from a good Hobie Cat dealer in Austin. Often, you can get great deals on eBay on the jib, blocks and trampoline, which are the most expensive parts. Overall, I did the project for a little over half of what is shown in the parts list below, but this includes a new jib and a new trampoline that combined cost almost $600. The remaining parts were purchased for less than $320.
The H16 or “Little 16” setup as Dan calls it, requires most of the typical H14 Turbo rigging, except the jib with the jibstay isn’t rigged all the time. Instead there is a separate forestay that supports the weight of the mast when the jib is not being used. To raise and lower the jib, there is a jib halyard setup just like the H16 that attaches to the upper forestay and consists of the jib halyard block, jib halyard wire, shackle, jib halyard line, downhaul block, cheek block and cleat. The cheek block and cleat are attached to the lower mast – again just like the H16.
Please note that this conversion requires some basic mechanical ability and should be undertaken at your own risk. Also, parts numbers shown in the parts list should be verified prior to purchase. Prices shown are from the 08-09 Hobie Cat Parts Catalog.
Let’s start with additions to the H14 trampoline frame that must be completed to allow you to use a jib and trapeze setup.
Dolphin Striker
First of all, you’ll need a dolphin striker. This provides additional support to the frame when you are out on the trapeze. You can bend your front crossbar if you fly a hull or trapeze without it. This is basically a solid post attached underneath your mast step that has a wire (or bar) with threaded post ends that attach using nuts to either corner casting (see picture below). Hobie Cat or Murray’s sells a dolphin striker for the H14 with that only requires 4 rivets and is pretty easy to install.

Installed Dolphin Striker
For the Dolphin Striker installation, you can use the striker post as your template for marking/drilling your four rivet holes. The bit size is 3/16”, as are the stainless steel rivets you will use. Once you have drilled your holes, use a pop rivet puller to attach the striker post.
I used a consumer grade pop rivet puller which I would now highly recommend you NOT use. Look for a pro model that has longer handles that will provide you with more leverage. The consumer models are fine for aluminum rivets, but it is pretty tough to pull stainless steel rivets with them.

Heavy Duty Rivet Puller
Once your striker post is installed, thread the support wire through the solid post end and attach the ends to the corner castings using the provided nuts (see picture below). Tighten the nuts to the point that the wire has a solid thud, but don’t over tighten or you could damage your crossbar or corner castings.
Once your striker post is installed, thread the support wire through the solid post end and attach the ends to the corner castings using the provided nuts (see picture below). Tighten the nuts to the point that the wire has a solid thud, but don’t over tighten or you could damage your crossbar or corner castings.

Attach Dolphin Striker to Corner Casting
Jib Block Support Wire
The next thing you will need is a trampoline with special grommets installed to allow two jib blocks to be attached through the trampoline to a jib block support wire that runs underneath the trampoline between the two sidebars. Unlike the Hobie 16, the jib blocks on the Turbo are on the trampoline rather than the front cross-bar (see picture below). I have seen H14 pictures with blocks rigged on the front cross-bar, but the typical setup is for the blocks to be on the tramp, attached to the jib block support wire.
The trampolines that Hobie Cat sells for the H14 have these grommets already installed. There are several places that sell aftermarket H14 Turbo trampolines (not class legal) as well.
Hobie Cat does sell a conversion kit for pre-1982 boats that includes grommets, (plus extended chain plates and the new length shrouds – see discussion below). You may also be able to buy the grommets and have them pressed into place at a tent and awning shop. See this pdf for placement: http://www.hobiecat.com/support/pdfs/e_turbojib.pdf
The jib block support wire attaches to the chain plates via a clevis pin on either sidebar and you tighten it using the turnbuckle until it’s tight, but doesn’t begin to bow the side bars (see picture below).

Jib block support wire
If you have a pre-1982 H14, the chain plates will likely not have the extension with the extra hole extending out from the frame and under the trampoline to attach the jib block support wire. If this is the case, you will need to drill out the old rivets holding the old chain plates to the sidebar and replace them by riveting in the new chain plates. You can get the turbo chain plates individually or a part of the Turbo conversion kit mentioned above.
I had to replace the old chain plates and it was a pain because you have to remove the frame from the pontoon pylons in order to get enough clearance to drill out the old rivets on the underneath side of the sidebars. I would suggest you get a rubber hammer to assist in getting the frame off the hull pylons after you remove the pylon bolts. The hammer is also helpful in getting the frame back on the pylons. Don’t use a regular hammer or you may break your corner castings. Also, be careful when knocking the corner castings back onto the pylons. Hit them with your rubber mallet in several different places so that they go on evenly. When you get to the point that the holes line up again STOP! If you keep pounding, you will damage the setting of the pylons inside the hulls and you will see a bulge in the sides.
Once you have the jib block support wire in place, the blocks attach through the trampoline grommets to the jib block support wire using small shackles (usually included with the blocks).

Jib block installed on trampoline
Cheek Block and Cleat
Next, you need to attach the cheek block and cleat to the lower right side of your mast (as you face the mast from the front of the boat – see picture below). Again, use your cheek block and cleat as your drilling template. These too will require 3/16”stainless steel rivets, but the rivets for the cleat are longer.
You can also tap holes and use fine-threaded bolts for the cleat if you can’t fit the head of your rivet gun inside the cleat (flush with the head of the rivet), but you should be able to use rivets on the cheek block. (Note: you may find it more comfortable to install the cheek block and cleat on the right side if you are right-handed.)

Cheek block and cleat
Note that many rivets do not provide a water tight seal. I was lucky because Dan gave me a number of rivets that had a closed or cupped end or sleeve, so that when you pull them, they seal. If you can find these rivets on the web, they are much better because the last thing you want is a leaky mast when you capsize. Your Hobie dealer should have the separate sleeves to use with the open-ended rivets. If you can’t find any, you will want to seal all rivets with silicone.

Note that many rivets do not provide a water tight seal. I was lucky because Dan gave me a number of rivets that had a closed or cupped end or sleeve, so that when you pull them, they seal. If you can find these rivets on the web, they are much better because the last thing you want is a leaky mast when you capsize. Your Hobie dealer should have the separate sleeves to use with the open-ended rivets. If you can’t find any, you will want to seal all rivets with silicone.

Cleat with rivets and sleeves
Jib Halyard Rig
All wire rigging for the jib halyard setup can be “manufactured” at a West Marine store or purchased custom from a sailing shop that makes rigging. At West Marine, they won’t swage the cables for you due to concerns about liability (should you dismast), but you can make them up yourself. Use two sleeves on each thimble to ensure a tight connection and reduce the chance of your rigging coming apart. All cable lengths listed in this article are the finished length measuring from thimble end to thimble end.
The halyard block and downhaul block can be purchased from Hobie Cat. I listed the blocks from the H16 in the parts list. These are a little pricy, so look on eBay for a used H16 Jib Halyard rig with these included. If you buy the H16 Jib Halyard rig, you could also modify the H16 cable lengths to work on your H14.
The upper forestay or pigtail consists of a 1/8” 1 X 19 wire, 8” in length with thimbles on both ends. One end attaches to the mast tang via the shackle (along with your shrouds, trap wires, etc.) and the other to the jib block assembly on the jib halyard block using a clevis pin and cotter pin.
The lower forestay consists of a 1/8” 1 X 19 wire, 13’ in length with thimbles on both ends. Note that this 13’ length is for using two 7-hole adjusters (discussed below). You will want to add about 6” to the length if you only use one 7-hole adjuster.
The lower forestay attaches to the bottom of the halyard block using a clevis pin/cotter pin and then to the 7-hole adjuster using a clevis pin/ring ding.
The full halyard consists of a wire halyard made of a 1/8” by 7 X 19 cable, 11’ 8 ½” long, running through the halyard block with a thimble and shackle on one end (for attaching the jibstay wire) and the other end with a thimble that is attached to the downhaul block. Note: this must be attached to the downhaul block at the time you make the halyard wire. The downhaul block then has the jib halyard line tied to it. The halyard line is 27’ 6” in length and 3/16” in diameter.

Little 16 jib Halyard setup (cable lengths not to scale)
Bridles
The bridles attach to the 7-hole adjuster using a bell shackle as they do in a unirig H14 setup. The turbo bridle wires are 1/8” 1 X 19 cables, 3’ 10” in length with thimbles on both ends. Note you don’t want to buy the Hobie Cat stock Turbo bridles because they have one forked end to attach to a jib furler.
Using Two 7-hole Adjusters
Rather than use one 7-hole forestay adjuster, Dan suggested I use two adjusters connected by a clevis pin with some tightened bungee cord between the two. When the lower forestay becomes slack as you hoist the jib, the bungee pulls the top 7-hole adjuster and lower forestay forward and away from your jib. This helps keep the lower forestay out of the way and protects your jib from excess rubbing. See illustration below.

Two 7-hole adjuster setup (cable lengths not to scale)
Jib
Hobie Cat sells the class legal jibs, and you can also get used ones on eBay. Its worth looking because this is one of the most expensive items on the parts list. There are also aftermarket jibs (not class legal) sold by a few suppliers. There is at least one supplier that lists H14 jibs on eBay as well.
Jib Sheet / Clew Blocks
You’ll also need a jib sheet along with two jib clew blocks and a shackle for attaching to the clew of the jib. The jib sheet is 5/16” and 32’ long. See diagram below for how to run the jib sheet.

Shrouds
The shrouds measure 15’ 3 ¼”. If you have a pre-1982 H14, the shrouds may need updating to the new length. I was able to use the shrouds on my boat as they were the correct length. Hobie Cat does sell shrouds of this length separately or in the Turbo Upgrade Kit (along with the chain plates and trampoline grommets). These often can also be found on eBay.
Trapeze Setup
Trapeze wires measure 13’ 5” each. You’ll need a set of two, plus two dogbones, two adjuster lines, two rope locks and one shock cord to attach the adjuster lines and runs beneath the trampoline (see picture below).

Trapeze rig
Rigging Instructions
See this helpful pdf showing how to rig a Hobie 16. The same principles apply to rigging your Little 16 jib setup.
http://www.sailtoronto.com/PDF/Hobie%20Rigging%20Basics.doc
Dan advised me that you want to have the full load of the mast on your jibstay so that it is rigged tight. Also, the lower your jib on the 7-hole adjuster, the better. I attach mine to the shackle that connects the 7-hole adjuster to the bridles using a twist shackle Dan included with the parts I bought from him.
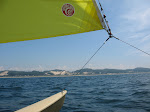
The final product is shown below. Happy sailing.
Rigging Instructions
See this helpful pdf showing how to rig a Hobie 16. The same principles apply to rigging your Little 16 jib setup.
http://www.sailtoronto.com/PDF/Hobie%20Rigging%20Basics.doc
Dan advised me that you want to have the full load of the mast on your jibstay so that it is rigged tight. Also, the lower your jib on the 7-hole adjuster, the better. I attach mine to the shackle that connects the 7-hole adjuster to the bridles using a twist shackle Dan included with the parts I bought from him.
The final product is shown below. Happy sailing.

Finished boat
Other helpful hints from Dan:
I added a bungee to the mast that keeps the jib sheet from fouling. Simply tie a bungee around the front beam near the corner casting, run it through the existing halyard cleat (front center of the mast) and to the frame on the other side. Make sure this bungee goes under the jib sheet.
I also found that you want the jib to be attached to the bridle/forestay connection as low as you can get it. I used a twist shackle attached to the shackle that connects the bridles and forestay.
The jib clew plate has several holes in it. Based on the rake of your rig, you need to adjust it to find a sweet spot. Move the shackle (that holds the clew pulleys) up and down the plate until you get even tension on the bottom and back of the jib. This will give you a better sail shape and keep the sail from flapping.
A few advanced helpful hints from Dan:
A Hobie14 sails much better with a very raked-back rig. There is a lot of discussion on this topic on many of the forums, but I will give a brief synopsis. You typically want to have your mast raked back so far that when going upwind, your main blocks are block-to-block—and that is using the low-profile 2.25” blocks. This requires you to have adjustable upper rudder castings so that you can rake your rudders under the boat to compensate for the mast rake. This makes a Hobie 14 very fast and gives it less tendency to pitchpole. You will find that you sit farther forward and when you trapeze, your feet are right at the sidestays.
When I rigged my 14 with a jib, I found that it sailed much nicer with slightly less rake and a tight rig. I couldn’t get the jib to tighten properly, but when I moved the rig forward by moving the sidestay pins up, the angle moved it onto a better position. This is something you will have to adjust until it feels right for you.

Here is a table of all the parts numbers, cable lengths, 2008 prices, etc. Click to make larger.

This is very helpful! I just got an old or should I say "vintage" Hobie 14 and want to do the turbo upgrade. I just can't see myself shelling out for the "Turbo Kit" (over $700 Canadian $'s!) I want to do the ebay, Craig's list thing . . . I think the best thing to start with would be the dolphin striker - any advice on where to look?
ReplyDeleteThanks for the pics, too - very much more helpful than the Hobie Trubo PDF's!
I am sure I'll be in touch again.
Trevor Smith
Nelson, BC
I realise this is a long time ago, but it is still valid. Thanks for the tip om using a removeable jib, that does not require the hideously expensive furling system. Thanks for sharing.
ReplyDeleteHere you will learn what is important, it gives you a link to an interesting web page: Cat Caterpillar Pump 276-5906 2765906
ReplyDelete